|
|
After a mailing 'container' has been created in CS110, use CS111 'Mailing inventory contents' to add item editions to the mailing from the inventory. The contents of a mailing and how they are used are often complicated arrangements, and so CS111 offers many features to deal with this.
An overview of the mailing inventory contents screen (CS111)
Using the screen to add items to a mailing
Using the screen to change details about items in a mailing
Using the screen to remove an item from a mailing
Use the header to retrieve the module and presentation for which you want to view the inventory. If you are unsure of the presentation code, or if it is a pack, just enter the module code and a list of the presentations or pack mailing periods will be shown. Use the hyperlink on the presentation code to go on to the Mailing inventory contents screen.
The mailing contents screen is an extremely complicated one. It is divided into three tab sections:
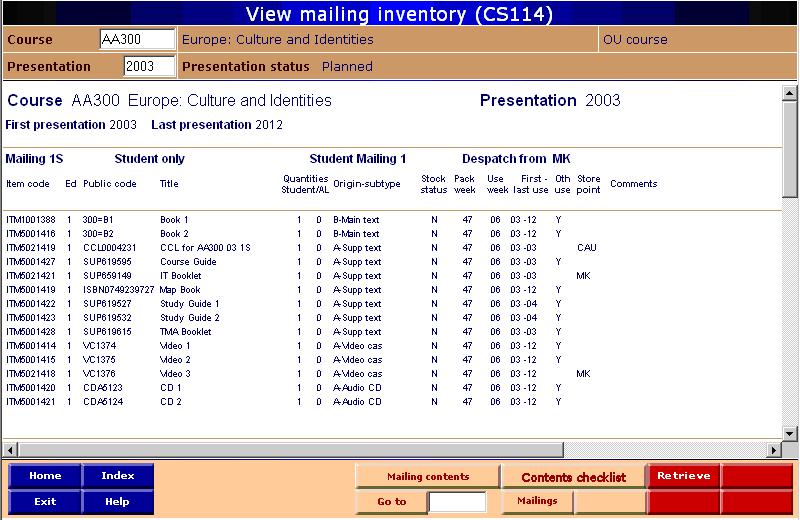
If you only want to see what is in a mailing, you will find CS114 gives a better overall view. However, if you should want to see only a single mailing, the Select a mailing tab enables you to view one mailing at a time, as described below.
Before you start work to put items into mailings, be sure that you have created the necessary mailing records in CS110 and created the records for all the item editions to be included in the mailing. You will also need to check that:
When you create an item edition record, an Item edition use record is also created. This is where you set the limits of the particular edition’s use by indicating its life, that is, the first and last presentation of use for the item edition. You must complete CS087, Maintain item edition use, to show the life of an item, so that it is available for allocation to a mailing.
Using this item use information, CS111 lists all the items for a particular module presentation that are available for allocation to a mailing (i.e. where the mailing’s presentation falls within the edition’s use period). Note too that:
If an item appears that does not belong in this particular presentation or an item is missing which should be there, use CS087 Maintain item edition use to change the first or last use presentation for the item as necessary.
Item editions rather than impressions are linked to a mailing. This is because impressions ought, by definition, to be interchangeable. It is also the case that, at the time that you link items to mailings, you may not be able to determine precisely whether existing stock is sufficient to meet the full demand created by the mailing. A single mailing may, therefore, involve the dispatch of more than one impression.
If you have an exceptional reason for wanting a particular impression to be used in preference to others (for instance, where you want to use the oldest impression for a pack rather than a module) you should use the comments field on CS111 to convey this information.
In unusual cases, you may need to link more than one edition of a specific item to a single mailing. Planet will allow you to do this.
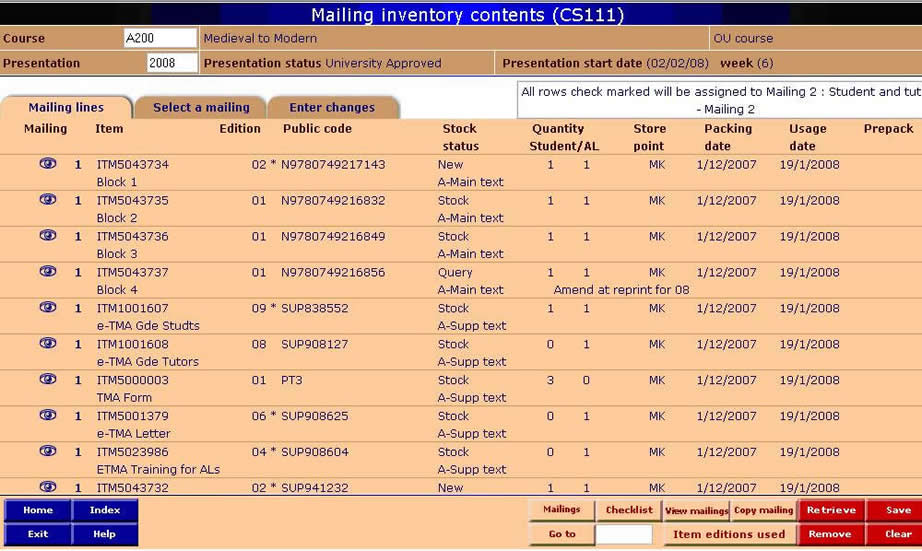
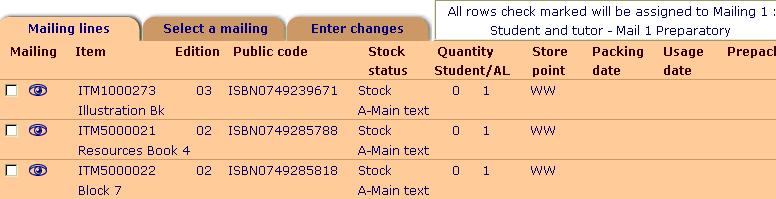
This is the default tab when you first enter CS111. It displays all the item editions available for allocation to the module presentation’s mailings, and shows which items are already allocated to those mailings.
Only items with a use period that includes that presentation will be displayed as available for allocation. For example, if an item has a Last use of 2015B, then it will not appear in CS111 for the 2016B presentation. Similarly, presentation-specific items will only appear for one presentation only in CS111.
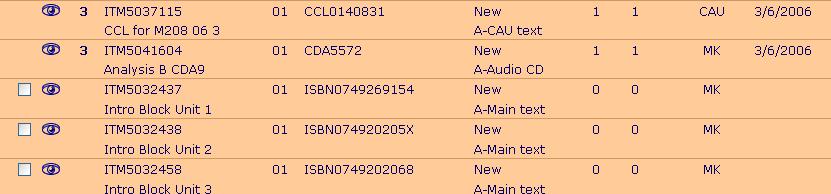
You can also get access to a list of fully allocated items if more than the prescribed number need to be distributed. This is covered in the next section.
It is also possible to hide other mailings so you can more easily view only one and do less scrolling. This is also covered in the next section.
Checkbox |
Allows you to select an item record for updating. |
Eyeball icon |
A link to the Item edition screen (CS080-84) for the item on that line. |
Mailing |
This is the mailing code. It consists of the mailing number and mailing type as set up using CS110. |
Item |
The unique code, beginning with ITM, which identifies an item. It is allocated by Planet automatically when the item is created. It is shown here with the item short title. |
Edition |
The edition number of the item. This corresponds to the edition number on the Planet item edition record set up in CS080-84. It should be the same as that recorded on the physical item. |
Annotation |
A marker that identifies the recipient cohort for a particular item or items within a mailing. This is used mostly for mailings despatched from MKDS where a single contents checklist is used for all recipients. |
Public code |
A unique code allocated (mainly by LTS) to every edition of an item (e.g. ISBN for main text and SUP for supplementary text) which may also appear on the item itself. ISBNs are international but most public codes are internal OU codes. The public code is set up in CS086. If a public code for an item changes, then a new edition of the item is required for the new public code. There are strict rules governing the format and application of public codes to item types, and Planet will validate any new public code with these rules. |
(e-text) |
For print items – beneath the public code – an indicator of whether the item is a print version or e-text. If it is print, this space is blank. An e-text is actually a type of use record; for more information, see the item section. |
Stock status |
A marker to indicate the status of item stocks for the item in the mailing:
|
Quantity per student/AL |
The number of copies of the item per student and per associate lecturer to be sent in a single mailing. In the case of a file issue or mentor mailing, the quantity is listed in the AL column. |
Store point |
The location at which the item is stored. Where the item has not yet been allocated to a mailing, the store point is derived by the system using a formula to determine which site is most likely. The user can change this. |
Usage date |
The first date on which the item is meant to be used by its recipient. |
Packing date |
The date on which the warehouse plans to pack the item for mailing. |
Prepack |
Indicates the planned packing strategy. It displays 'Prepack' if all the items in a mailing are packed well in advance of mailing and 'Partial' if only some of the items in a mailing are packed in advance. |
Comment |
A text field that allows users to place additional information next to an item in a mailing. |
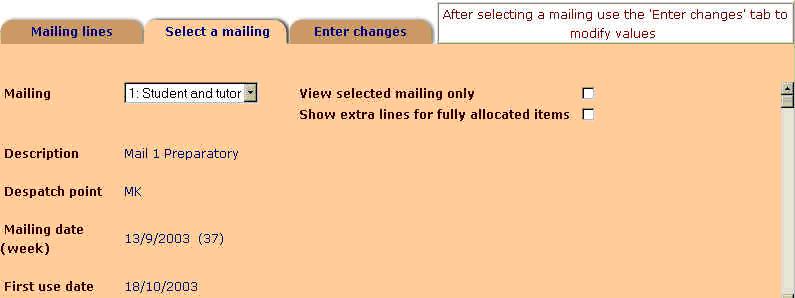
Use this tab to view only items for a specific mailing you want to work on, and to show any fully allocated items (if more than the prescribed number need to distributed).
Select a mailing from the drop-down list, tick View selected mailing only and Retrieve. If you want to see fully allocated items too, tick that box before retrieving.
Mailing |
This is a drop down list showing all the mailings created for this presentation. It shows the mailing number and the recipient code, along with the code definition, for each mailing. From it, users select the mailing they want to populate, change or view separately. |
View selected mailing only |
A check box which, when ticked, allows users to view, on the Mailing lines tab, only the mailing selected from the drop down list. |
Title |
Also called Mailing description. The descriptive short title that allows a meaningful text to be associated with the mailing. In particular, this title is available for inclusion within the OU’s Materials Despatch website. |
Despatch point |
Identifies the site from which the mailing will be despatched. |
Mailing date (week) |
The date on which the mailing is to be despatched from the Despatch point. Frequently it will be a Saturday, indicating that the mailing will take place the week beginning with that date, although other dates are accepted by the system. When the date is saved, the week number, as well as the date, is shown in brackets. |
First use date |
Use dates indicate when particular inventory items must be available to be used by students or other recipients. The First use date shows the earliest of these dates for the items within a mailing. Because use dates are optional, there may not be any dates from which to derive an ‘earliest’ (in which case this field will be left blank), or dates may only be provided for some of the items. In the latter case, an earliest will be shown. However, to indicate that it is only the earliest of those dates given, it will be flagged as such with an asterisk. |
Show extra lines for fully allocated items |
A facility to allow you to make additional links to an item for more mailings when all quantities have been used up: e.g., when there is a file issue mailing as well as a student and tutor mailing. |
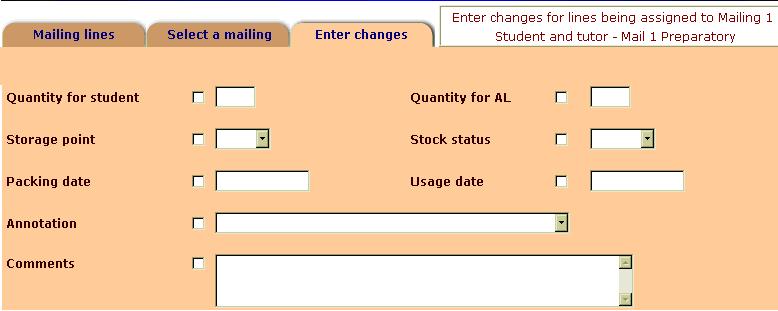
Use this tab to change the ways in which items selected in the ‘Mailing lines’ tab are used in a particular mailing. How this is done will be explained further in the next sections.
Quantity for student |
An input box to change the number of copies of the item for each student to be sent in the mailing. |
Quantity for AL |
An input box for changing the number of copies of the item to be sent to each Associate Lecturer in the mailing. In the case of a file issue or mentor mailing, use this field for the quantity. |
Storage point |
(Called Store point on the Mailing lines tab.) The location at which the item is stored. Where the item has not yet been allocated to a mailing, the store point is derived by the system using a formula to determine which site is most likely. The user can change this. |
Stock status |
A drop down list showing options to indicate the status of item stocks for the item in the mailing:
|
Usage date |
An input box allowing the user to change the first date on which the item is to be used by its recipient. |
Packing date |
An input box for changing the date or week in which the warehouse is to pack the item for mailing. |
Annotation |
A drop down list with various options to mark the recipient of a particular item or items within a mailing. This is used mostly for mailings despatched from MKDS. |
Comments |
A text box to use to add comments about a particular item on a mailing. It can be used, for example: to indicate whether a particular impression is required, the item is an assembly pack, the item is a shrink-wrap or there is a swap-out option for the item. |
Shrink-wrapped packs and assembly packs are linked to mailings as one item. When you create the ‘pack item’ using CS067, use item type 'internal assembly' for an assembly pack (assembled in the warehouse) and external assembly for shrink-wraps (assembled externally).
Use the assembly contents screen CS068 to add items to the pack. Do not link the separate items in a shrink-wrap to a mailing. A separate contents checklist specifically for assembly and shrink-wrapped packs is available via REP10.
Occasionally you will need to allocate an item to a file issue or other mailing when both tutor and student quantities have been used up and the item no longer shows at the top of the screen.
This screen shows you all the mailings for a module presentation much more easily than having to use CS111. The only things to select are the module and presentation for which you want to view mailings. The mailing information displayed can be easily printed out for reference purposes.
Next: creating and using contents checklists